BUILD YOUR OWN MINI LIBRARY
Well I've spent several hours in my program for laying these types of books out and I edited it to make my own books. So my basic instructions for putting a book together.
TO PUT THE MINI-BOOK TOGETHER
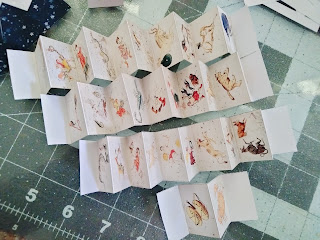
1) Print the book and pages out on high quality paper. I only use matte presentation paper. These will not look good or print bright and sharp on plain text weight copy paper. Fold the pages like shown so you can glue them together and leave two half end papers unglued so you can attach them to the inside covers later.
2) After folding the papers as shown, cut the three blank end pieces off of the right sides if you left them on like I did - except for the two page short piece. Leave blank half sheets on both ends of the short piece and glue it on the far right side of the accordion folded pages so you have one long folded strand with a blank page on each end. Glue them together end to end making sure the pictures are all right side up. The blank papers on the ends will be glued to the inside of the book cover.
3) Then cut out the front, back and spine from cardstock using the patterns and glue the card stock pieces onto the back of the large cover paper as shown. Leave a slight 1/8" between them for folding.
4) Then trim the papers as shown. Make sure to leave enough on the corners for folding down to cover the edges, then glue.
5) Use a bone folder to flatten the papers and to crease the folds.
6) Glue the inside half pages to the inside of the covers, front and back. Line it up first for a good fit.
7) You may have to trim the inside papers to get a good fit. cut them slightly inside the edge of the book. Glue them over the half sheet inside the front and back.
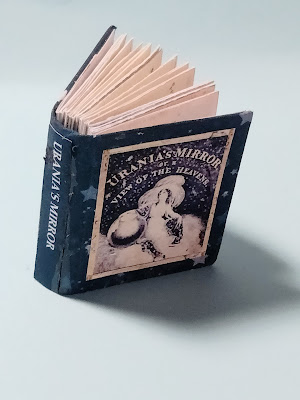
8) Just add your spine text and front graphic, then you're done. Pretty easy! Now you have a cute little book for your miniature bookcase.


Comments
Post a Comment
Thank you for taking the time to comment. Comments are being spam filtered and are usually added within the hour.